How to Make Caramelized Onions
Caramelized onions are slowly cooked, caramelizing their natural sugars to develop a depth of flavor that is so SO good! These melt in your mouth onions are like onion jam. I love adding caramelized onions to burgers, sandwiches, pasta dishes, etc.

This is an IN DEPTH post (just how I like ’em) on everything you need to know to make the perfect caramelized onions.
Caramelized onions take a little extra time to make, but the flavor payoff is SO worth it. Even if you are a person who doesn’t like onions, I bet you will love them caramelized. Don’t be intimidated by making caramelized onions. Although they take a little practice and time, even home cooks can do it.
Quick Tips
- Salt the onions in the beginning of the cooking process to draw the water out faster.
- Adjust the heat if onions are browning too quickly.
- Use a deglazing liquid to add extra flavor into your onions.
- The secret trick to caramelizing onions is to allow them to stick to the pan just long enough for them to start caramelizing, but move them again before they start burning.
Equipment
- cutting board
- sharp knife
- cast iron skillet or stainless steel pan
- metal spatula or wooden spoon
- optional – silicone ice cube trays or plastic bags for freezing the leftovers
What kind of pan is best for caramelizing onions?
The best pan for caramelizing onions is either a cast iron skillet or a large stainless steel sauté pan. You want to use a heavy pan with a wide surface area to maximize caramelization of the onions.
It is possible to use a non stick pan to caramelize onions if that is all you have, but it’s not the best option. You actually want the onions to stick to the pan a little, forming the fond. Fond is the bits of cooked food that stick to the bottom of the pan. Scraping up the fond as the onions caramelize will add to the deep rich flavor of the onions.
I wouldn’t recommend using a dutch oven, or any pot/pan with high sides, as this will keep more condensation in, and you want the moisture to evaporate.
Ingredients

You only need a few simple ingredients to caramelize onions:
- onions
- fat or oil
- salt
- optional – Sugar or a substance with a high sugar content is optional, especially if you are using onions with an already high sugar content.
- optional – deglazing liquid. You can use water to deglaze as well.
Another great thing about caramelizing onions is that there is no specific recipe. You can use as much oil, salt, or sugar as you need to fit your tastes. I love a good non-recipe recipe since it helps reinforce your intuitive cooking skills!
What are the best kind of onions for caramelizing?
Most kinds of onions will caramelize. Typically, the sweeter the onion the better for caramelizing, but any onions will work! You can caramelize yellow onions, red onions, white onions, Vidalia onions, Walla Walla onions, Spanish onions, sweet onions, etc. The type of onion you choose is up to you, but sweet onions and yellow onions are the best onions for caramelizing in my opinion.
I usually use regular yellow onions since that is what I most likely have on hand. Yellow onions are most commonly what you will find in the grocery store.
I typically do 3 pounds of onions at a time when caramelizing them. It sounds like a lot but the onions will cook down a ton during the caramelization process.
Three pounds of raw onions will yield about 1.5 cups of caramelized onions.
Butter vs Oil
Is it better to use butter or oil for caramelizing onions? The best answer is a little bit of both. While butter will add extra flavor to your onions (especially a European style butter), oil has a higher smoking point and will help prevent your onions from burning.
For best results, start off with olive oil and finish with butter.
How much butter or oil you use in your onions can also affect the final product. Adding more fat or oil will cause the onions to fry rather than caramelize. Adding less fat or oil will help the onions be softer.
What do you use to caramelize onions?
As I said earlier, added sugar is optional especially if you are using sweet onions like Walla Walla or Vidalia. With that being said, I do like to add a little extra sweetness at the end of the cooking process. White sugar is most commonly used but you can use a lot of different substances with a high sugar concentration.
Some common sweeteners for caramelizing onions include:
- white sugar
- brown sugar
- honey
- maple syrup
- agave
Deglazing liquid
You can also add extra flavor and sweetness by the liquid you choose to deglaze the pan with. Choose a deglazing liquid based on the extra flavor you want to add. Some common deglazing liquids for caramelizing onions include:
- balsamic vinegar – I like using balsamic vinegar for caramelized onions to add to baked brie.
- soy sauce
- red wine vinegar
- Worcestershire sauce – perfect for making caramelized onions to add to your steak.
- wine
- beer – would be great as a side for serving Brats or sausages.
- rice vinegar
- broth or stock
- Bourbon
You can also deglaze the pan with water! At any point if your onions are sticking too much, and fond is forming on the pan that you can not scrape up, add a splash of water to help loosen it.
How to cut onions for caramelizing?
There really isn’t a right or wrong way to cut onions for caramelizing, it comes down to personal preference. The 3 most common ways to cut them are the horizontal cut, the vertical cut, or diced.
The thickness of your cuts will depend on the final texture you are going for. I think 1/4 inches is probably perfect. You want to keep your cuts consistent so all the onions cook evenly. If you slice them too thinly, they will dry out quicker and be more likely to stick to the bottom of the pan and burn. If you slice them too thick, the outer sides will brown more quickly than the inside causing them to cook unevenly.
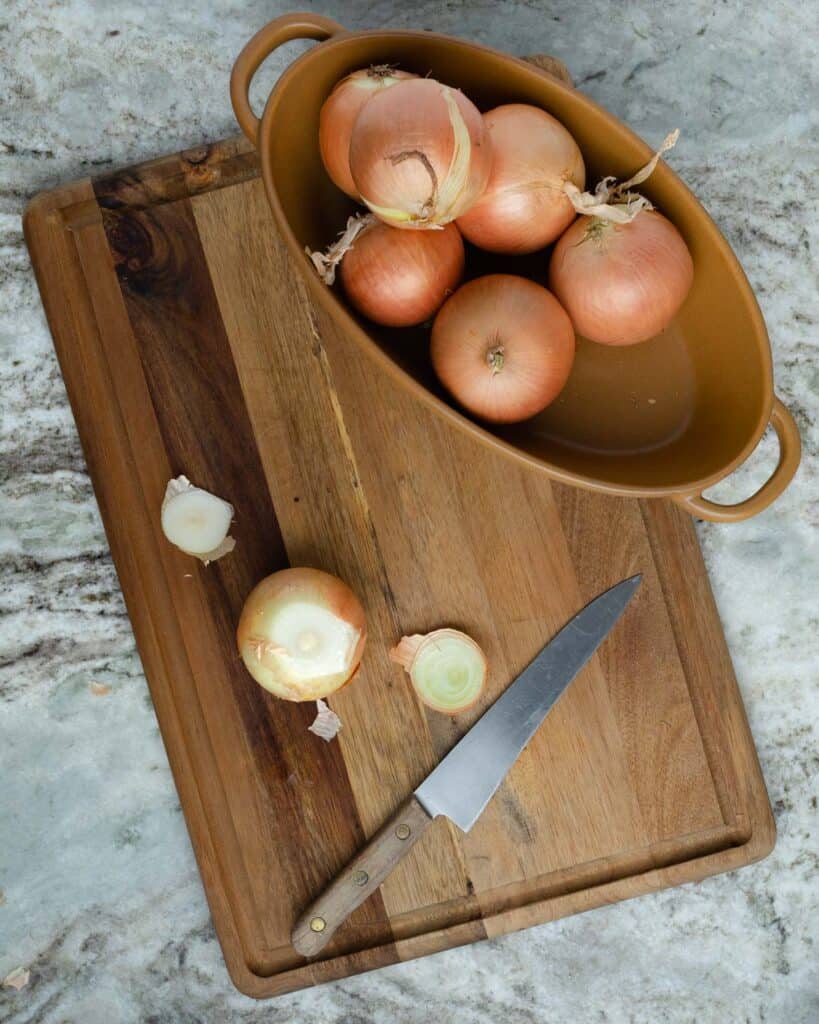
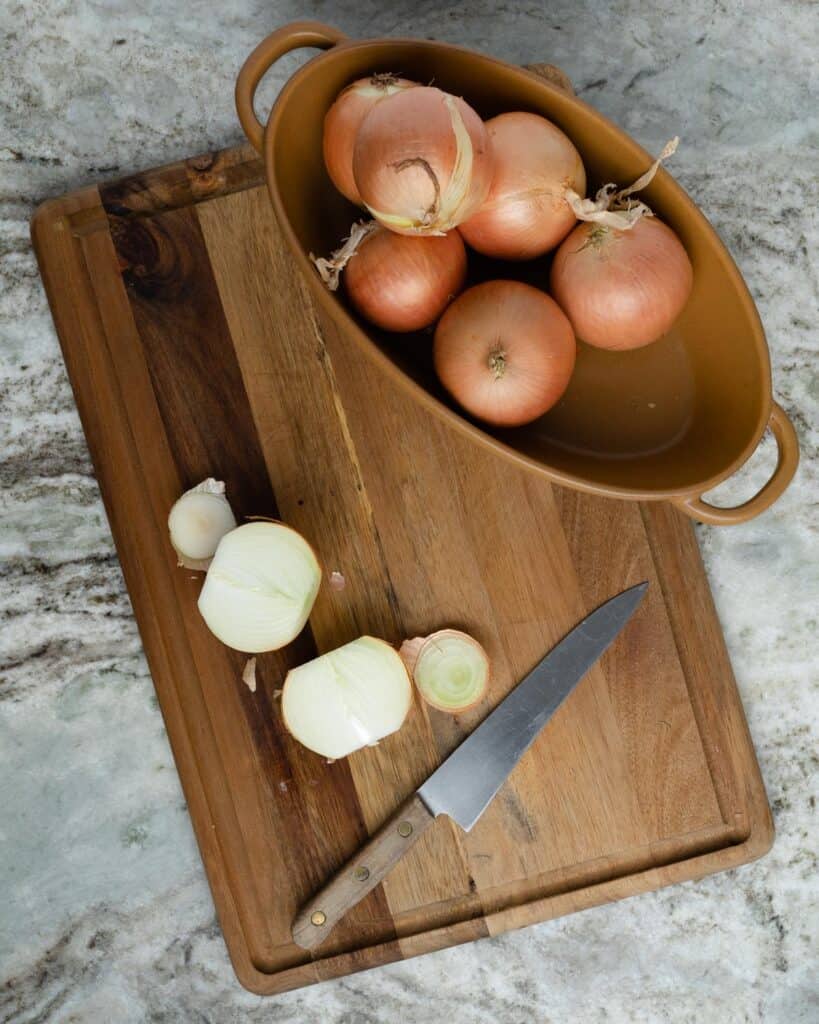
For any cut of onion, start by cutting off the stem end and root end of the onion. Turn the onion cut sides up and down, and cut the onion in half. Peel the onion and remove any tougher outer layers.
The vertical cut
To cut onions vertically, start by cutting the onion as above.
With the center of the onion cut side down, cut the onion into crescent moon shapes, cutting with the lines of the onion. You will be making cuts pole to pole, longitudinally.
Vertically cut onions will hold their shape better throughout the cooking process.

The horizontal cut
To cut onions horizontally, start by cutting the onion as above.
With the center of the onion cut side down, cut the onion into half rings, about 1/8 – 1/2 inch thick. You will be cutting across the lines in the onion, latitudinally.
Horizontally cut onions have a tendency to fall apart a little more during cooking.

Diced
You can also dice onions for caramelizing. This method will produce more of an onion jam texture, rather than have distinguishable onion pieces.
Diced onions end up more of an onion jam texture after caramelizing.
How to make caramelized onions
I will warn you, caramelizing onions does take a bit of time BUT I promise the end result will be so worth it. You are going to need about an hour for the whole process. This is also why I like to do a large batch. If I’m going to be standing over the stove for an hour, I might as well maximize my yield and freeze some for later.


First, heat butter or oil over medium low heat in a large skillet, and about 1/3 of your sliced onions. If you add all the onions to the pan at once, chances are your pan will be overflowing.
Stir the onions around the pan, coating them with oil or butter. Cook the onions for a few minutes while stirring so they reduce some. After a few minutes add another 1/3 to the pan. Repeat this again until all onions are added to the pan, and coated with butter or oil.
After all the onions have been added to the pan, add the salt. how much depends on the amount of onions. Using 1/4 teaspoon of salt per pound of onions is a good place to start, however always start with less, then you can add more later if you need to.
Continue stirring the onions every few minutes, scraping up any fond (the browned bits that stick to the bottom of the pan) that forms as you go. A metal spatula is best for this, but a wooden spoon should work too.


The secret trick to caramelizing onions is to allow them to stick to the pan just long enough for them to start caramelizing, but move them again before they start burning. This is a skill learned with time, so don’t be afraid to practice!
As the onions caramelize, they will turn from white, to light yellow, to golden, to deep rich brown.
Add a splash of water or deglazing liquid when fond starts to form on the bottom of the pan that you can not easily scrape up.
At any point if you feel the onions are cooking too quickly, turn down the heat slightly. If you feel they are drying out too quickly, you can start adding deglazing liquid 1 tablespoon at a time.
Towards the end of the caramelization process, after about 30-45 minutes, you can add your sweetener, if using. You can also finish off with a tablespoon of butter to add some extra flavor.


If you haven’t added any deglazing liquid at this point, add it now. Stir the onions and scrape up the fond with the liquid. Stir and continue cooking until the deglazing liquid has evaporated.
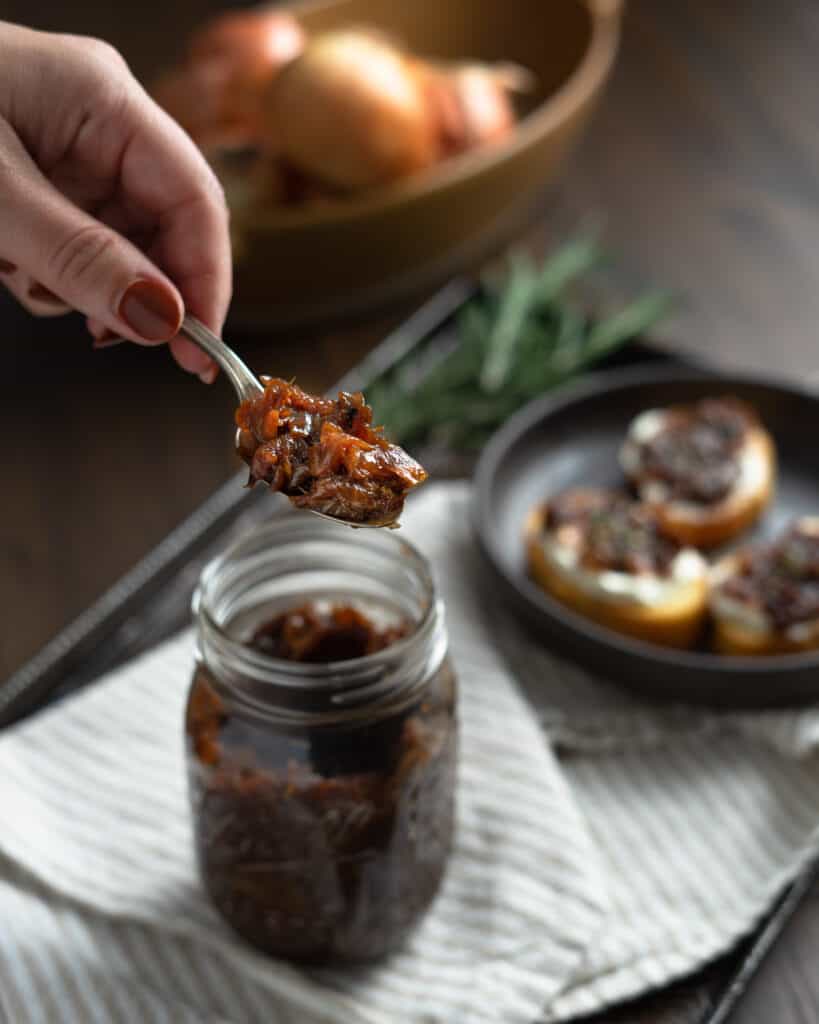
The final product should be deep rich brown jammy onions that are soft, but not mushy.
When to salt caramelized onions?
There are two schools of thought on when to add salt to your caramelized onions: at the beginning or at the end.
If you add salt in the beginning of the process, the salt will start drawing the water out of the onions before the onions have a chance to caramelize. Getting rid of some of the moisture in the beginning helps the onions caramelize more slowly, but in my experience yields better results.
If you add the salt towards the end of the process, the onions will start to caramelize before most of the moisture is drawn out. While this may help the onions to caramelize more quickly, I think the best caramelized onions are made when you add the salt in the beginning.
Caramelized Onion Troubleshooting
- Onions are browning too quickly – Turn the heat down, and add a splash of deglazing liquid or water. Stir more frequently.
- Onions aren’t browning quickly enough – Turn the heat up slightly and stir less frequently.
- Onions are browning unevenly – Stir the onions more often. You also may need to cut smaller onion slices next time.
- Too much liquid – Turn the heat up slightly and allow the onions to cook longer, allowing liquid to evaporate. Continue stirring and scraping up any fond on the pan.
- Caramelized onions turned out mushy – I actually like my caramelized onions to be a little mushy – more like onion jam. To prevent your caramelized onions from getting mushy, try making thinner slices next time. Also overcooking and adding too much deglazing liquid can yield mushy caramelized onions.
How to store
You can store your caramelized onions in an airtight container for up to 3-4 days In the refrigerator. You can also freeze them! Make a big batch and freeze the rest for later.
I like to freeze caramelized onions in silicone ice cube trays until solid. Then pop them out and store them in a freezer bag. You can also freeze them directly in freezer bags, but I recommend freezing smaller portions at a time in case you don’t need to used them all at once.
Can caramelized onions be made ahead of time?
Yes – you can make caramelized onions a few days ahead of time and store in the fridge, or a few months ahead of time and store them in the freezer.
Other methods of caramelizing onions
While there are other methods of caramelizing onions which claim to be faster – instant pot, crock pot, oven – I don’t recommend any of them. There really is no shortcut to get those perfect caramelized onions with deep rich flavor.
Like I said earlier, they take some time, but are totally worth it.
How to use caramelized onions?
Now for the fun part. You’ve devoted an hour of your life to create these delicious sweet caramelized onions that are packed with so much flavor – so how will you use them? Here are some of my favorite ways to use them up.
- on a charcuterie board
- combine with goat cheese and crackers or sliced baguette
- burgers – a key ingredient in Turkey Burger with Caramelized Onions, Melted Brie, Sun-dried Tomato Mayo, Bacon and Arugula
- steak
- sausages
- sandwiches (think of how good they would be on a steak sandwich with some horseradish mayo)
- french onion soup
- on baked brie
- on chicken
- in dressing
- in an omlette
- on hotdogs or brats
- grilled cheese
- caramelized onion dip
- toast with goat cheese
- stir into mac and cheese
- serve over mashed potatoes or polenta with gravy
- pasta
- patty melts
- in quiche
- add to pasta sauces
Variations/substitutions
Once you’ve mastered the art of caramelizing onions, you can start to make them your own. Add different ingredients and flavors to the onions to make them even better.
- caramelized onions with mushrooms – Add in sliced mushrooms toward the end of the caramelization process and cook until browned.
- caramelized onions with roasted garlic – A bold flavor combination! Mix roasted garlic into the caramelized onions when both are done.
- with jalapeños – Add in the fresh sliced jalapeños towards the end of cooking for a spicy version. This would be awesome for fajitas!
- with fresh herbs – Change up the flavor profile of your onions by stirring in fresh herbs at the end of cooking.
- make them vegan – To make caramelized onions vegan, simply use oil instead of butter, or use a vegan butter. Also use an alternate sweetener instead of honey.
FAQs
Caramelized onions are finished when they are deep rich brown in color and are soft, but not mushy.
Yes! You can freeze caramelized onions. I like to freeze them in silicone ice cube trays or a small freezer bag.
The secret to caramelizing onions without burning them is to keep the heat medium low, and continue stirring them frequently, but not constantly.
It takes about 1 hour to caramelize onions.
To properly caramelize onions, do so with the lid off. You want the water to evaporate out from the onions to allow them to caramelize and if the lid is on they will steam rather than caramelize.
Any questions? I’d love to help! Drop a comment below or send me an email!
How to make caramelized onions
Ingredients
- 3 pounds onions, sliced or diced (yellow, red, white, Vidalia, Walla Walla, Spanish, sweet, etc)
- 1 tablespoon extra virgin olive oil ()
- 2-3 tablespoons deglazing liquid (water, vinegar, broth, beer, wine, etc)
- salt (to taste)
- sweetener (optional – sugar, brown sugar, agave, honey, etc.)
- 1 tablespoon unsalted butter
Instructions
- ADD THE ONIONS: Heat butter or oil in a large cast iron skillet or stainless steel pan over medium low heat. Add the onions to the pan in batches, while stirring. As the onions wilt down, add more onions until all onions can fit in the pan.
- SALT: Add salt to taste. Start off with less than you think you will need. The onions will shrink down a lot, and you can always add more salt later.
- STIR AND SCRAPE: Continue stirring the onions every few minutes, scraping up any fond (the browned bits that stick to the bottom of the pan) that forms as you go. Onions will go from white/yellow, to golden, to golden brown, to dark rich brown as they caramelize.
- DEGLAZE: After about 30 minutes of stirring and scraping, onions should be almost dark brown. Add a few tablespoons of your deglazing liquid of choice to the pan and use it to scrap up the fond from the pan. Onions are done when they are rich dark brown and jammy in texture. You can also finish off with a tablespoon of butter for more flavor.
- SWEETEN: (OPTIONAL) You can also add more sugar or sweetener to the pan with the deglazing liquid.
- ENJOY: Add caramelized onions to burgers, sandwiches, steaks, chicken, in a dressing, on a charcuterie board, on hotdogs or brats, patty melts, quiche, omelets, pastas, soups – they are good in just about everything.
Notes
- This is a non-recipe recipe, meaning there are no exact amounts of the ingredients used. The above measurements are just a starting point, but you can adjust quantities as you see fit.
- 3 pounds of raw onions yields 1.5 cups of caramelized onions.
- The secret trick to caramelizing onions is to allow them to stick to the pan just long enough for them to start caramelizing, but move them again before they start burning. You want to stir frequently, but not constantly.
- Nutrition information does not include deglazing liquid or additional sweetener used.
- Onions are browning too quickly – Turn the heat down, and add a splash of deglazing liquid or water. Stir more frequently.
- Onions aren’t browning quickly enough – Turn the heat up slightly and stir less frequently.
- Onions are browning unevenly – Stir the onions more often. You also may need to cut smaller onion slices next time.
- Too much liquid – Turn the heat up slightly and allow the onions to cook longer, allowing liquid to evaporate. Continue stirring and scraping up any fond on the pan.
- Caramelized onions turned out mushy – I actually like my caramelized onions to be a little mushy – more like onion jam. To prevent your caramelized onions from getting mushy, try making thinner slices next time. Also overcooking and adding too much deglazing liquid can yield mushy caramelized onions.
Equipment
- sharp knife
- cast iron skillet or stainless steel pan
- metal spatula or wooden spoon